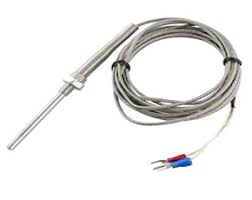
A noteworthy fact states that the thermocouples are internal thermometers that measure the change in temperature difference displacement over varying tasks from the manufacturing processes to water heaters. Understanding the appropriate arrangement of your thermocouple is very important for the accuracy of temperature readings, and how well your system will work. This blog will shed light on how thermocouples work, and aid in selecting the perfect pick for your necessity.
Understanding How Thermocouples Work?
Conglomerating Knowledge About Thermocouple Functionality
Constructionally, thermocouples are temperature-measuring devices that mainly introduce stiff bimetallic strips comprising two wires bonded together soccer-style on one end. A thermoelectric voltage is generated from a thermal junction due to the crossover of metal elements at a disparity temperature which is lower than a cold junction.
Thermocouple classification
Several thermocouple types have been defined and all are meant to measure a given range of temperatures depending on which thermocouple is being used. The most common include;
- Type K (chromel-alumel): Those widely applied instruments with a temperature range of -200 Degrees Celsius to 1260 Degrees Celsius temperatures.
- Type J (Iron-constantan)Used in the range of – art 40 – 750 Deg C; it does not get constructed to that much extent due because of oxidation.
- Type T (Copper-Constantan): The most reliable for low-temperature applications lying between -200 °c and 350 °c.
- Type S (Platinum-Rhodium): Utilized for high-temperature applications of up to 1480 °c.
Choosing a Thermocouple
Material Considerations
Material is very important when choosing a thermocouple. Type K thermocouples can be used in oxidizing environments while type J thermocouples will mainly be used in reducing environments. The materials should suit the process conditions.
Temperature Range
In choosing a thermocouple, consider the range of temperature that will be needed for a particular use. Be sure that the type that is selected is able to withstand the maximum temperature that is required without any deterioration.
Wiring Your Thermocouple
Required tools and materials
To wire the thermocouple you will require the following;
- Thermocouple wires (appropriate type and length)
- A temperature controller
- Wire strippers
- Soldering iron or crimp connectors
- Electrical tape or heat shrink tubing
Wiring Configuration
Wire your thermocouple by completing the following steps.
- Strip Wire Ends: Wire strippers can be employed to cut the thermocouple wire’s insulation claiming to be about 1/2 inch exactly.
- Connect the Wires: Attach the positive (usually the color that represents the type e.g. red in cases of Type K) and negative wires to the appropriate terminals on the thermocouple temperature controller.
- Adequate Protection: Advanced thermomechanics can incorporate insulation materials such as electric tape or heat shrink tubes to cover visible connectors to avoid short circuitry or other interference.
Connecting the Thermocouple with Temperature Controller
Initial Steps for the Thermocouple
After wiring the thermocouple, let us proceed to the setting of the temperature controller back:
- Power Up the Controller: Plug in the controller to an electric socket.
- Access Configuration Menu: With the help of the controller’s screen proceed to the setting and make changes.
Input Type Selection
Choose the proper thermocouple type in the configuration parameters. This way when being used with the thermocouple, the controller interprets the voltage due to the thermocouple accurately.
Calibration of Your Thermocouple
Importance of Calibration
For the temperature to be as precise as required, calibration of a device is fundamental. It accommodates the variance that lies upon the temperature reading by the thermocouple.
Calibration Process
- Prepare Calibration Equipment: (i) Size the appropriate calibration device into a calibrated heating medium i.e. a dry-block calibrator, or use an ice bath Measure known temperature: Insert the thermocouple into the source of calibration and wait for a voltage output then note this down.
- Adjust settings: When necessary besides recording the calibrating temperature set the temperature controller with the correct one so that precise measurements are guaranteed.
Troubleshooting Common Issues
Inaccurate Readings
In cases where your thermocouple is not providing accurate readings, look for any wirings that may be loose or shorted. Make sure the right thermocouple type is selected in the temperature controller.
Wiring Problems
Look at the wiring for any damage or corrosion. If there is, replace these wires to restore normal functioning.
You Should also read this Blog: How to Choose the Right Cartridge Heater for Your Industrial Needs
Conclusion
Bearing in mind the different configurations in which thermocouples are mounted, it’s apparent that proper thermocouple configuration is critical in achieving the desired temperature measurement results in any application. All this will help to provide them with a good working temperature measurement system by selecting the appropriate type of thermocouple needed for the situation, assembling appropriate wiring, and calibrating. Do not hesitate to troubleshoot any of these problems since they not only lead to performance deficits but also have long-term adverse effects. Whether in an industrial setting or a home heating system, completing the steps will assist you in configuring your thermocouple in the right way or process.

